|
What is needed? |
-
Zato's Driver-me Template, .rar archive downloadable from here.
-
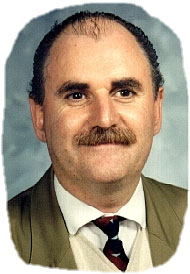
A frontal picture of you or the person or character you want to become a TRS driver. Pic should be the more frontal the better, with a resolution of 400 pixels or higher, .jpg format or else.
- An image processing application such as PAINTSHOP PRO or PHOTOSHOP. The latter is used all through this tutorial.
- Some basic skills when handling these applications.
|
| |
|
|
Getting ready |
1: Unzip the .zip file keeping the folder structure and saving to any folder you choose.
2: You will find two folders and a file
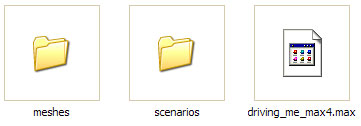
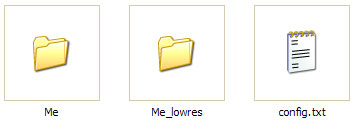
- Folder meshes contains another subfolder named DriverMe, which you should rename by the name you like the new driver to have. Inside this renamed folder, i.e., Zato or the name you like, you will find the following subfolders:
- Folder scenarios contains another subfolder named Me, which you should rename by the name you like the new driver to have. Inside this renamed folder, i.e., Zato or the name you like, you will find the following files:

- driving_me_max4.max is a file for the 3D Studio application, just in case you want to reshape the 3D mesh of the new driver, but it is not needed for this tutorial.
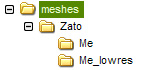
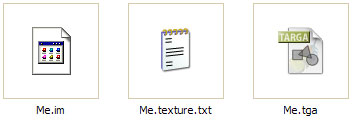
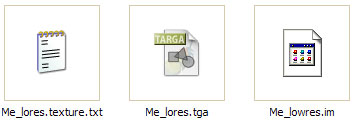
3: Let's go into the the folder meshes/Zato/Me where you can find the following files:
|
| |
|
|
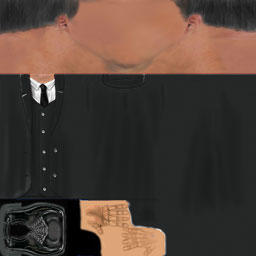
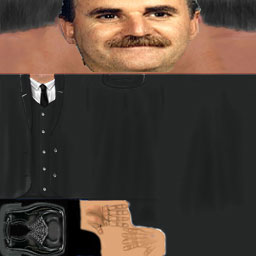
Me.tga in Photoshop |
4: This is the file to be worked on firstly so as to create a new 3D driver appearing inside cabs. Open it with Photoshop. You will see this:
5: Also, open the file depicting you or your would-be driver:
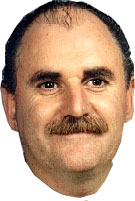
6: By using the Polygonal Lasso selecting tool 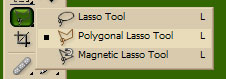 trim out your head and neck, copy and paste it as a new image. Reduce it (Image--> Image Size) WITHOUT CONSTRAINING PROPORTIONS down to some 143 x 113 pixels (of course this depends on how big-headed you are, he he) and finally copy the layer in order to paste it on the Me.tga file opened previously: trim out your head and neck, copy and paste it as a new image. Reduce it (Image--> Image Size) WITHOUT CONSTRAINING PROPORTIONS down to some 143 x 113 pixels (of course this depends on how big-headed you are, he he) and finally copy the layer in order to paste it on the Me.tga file opened previously:
 --> -->
Keep this file opened since we are using it again. Or save it as photoshop file to re-open it in a while.
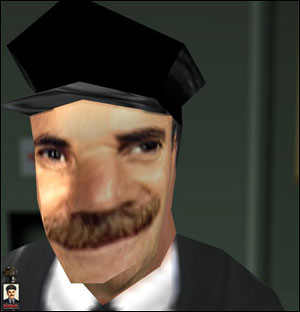
7: That's it, paste your distorted head as a new layer on Me.tga and move it so that your head covers the featureless area on the driver's head:
8: If the sides of the driver's neck and backneck are not the same colour or tonality as the guy from the sample picture (he he), try matching this by using the airbush tool or rather the healing one, but not much care should be taken on this point since these body parts are not seen well when peeping inside the simulator's cabs.
9: Save the file as a 24-bit uncompressed .tga; be careful with this point since, if not, you won't be able to visualize your new 3D driver inside a cab.
Then, that image should be Saved as... overwriting the Me_lores.tga file inside the folder meshes/Me_lowres.
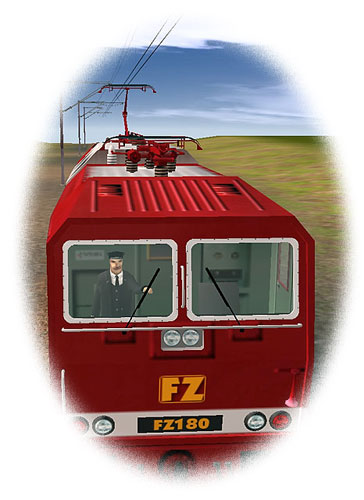
Eureka!, the new 3D driver is ready to work for you and your railway empire. The new driver will appear (if selected) inside the cabs of locos which have been enabled to happen so.
|
| |
|
|
| |
|
Me64.tga |
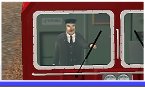
10: Now, time to work on the 2D driver. This is the driver icon appearing on Driver mode to show who is in charge of a loco or consist, as seen on the lower left corner of your Driver mode screen.

This file is Me64.tga, found inside the renamed subfolder scenarios/Zato/ (or by the neme you gave to your new driver) :

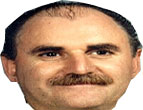
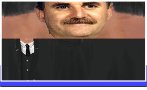
11: Open this Me64.tga file with Photoshop and get your trimmed-out head file again. Reduce the latter , this time by constraining proportions, down to such a pixel size that, after copied and pasted on the Me64.tga file, allows covering the faceless grey area on the driver icon. Please note that forehead and hair (the ones who have it, he he) areas should also be trimmed out so that the driver's peaked cap is shown.
-->  --> -->
12: Save the file as a 24-bit uncompressed .tga; be careful with this point since, if not, you won't be able to visualize your new 2D driver icon on Driver mode.
The artistic part of this tutorial is done, you have created both a new 3D and 2D driver.
|
| |
|
|
| |
|
Working on the config.txt |
13: Since you are really creating a TRS2004 'DriverCharacter' object, it is required to make some minor changes in the config.txt file of the mesh found in .../meshes/Zato/ (or by the name you gave to it)
By using your Windows Notepad, open the file and make the following changes:
-
Line kuid <KUID:your kuid here> should read kuid <KUID:AAAAA:BBBBBB> where AAAAA is you Auran ID number and BBBBBB, the number you like from 1 to 999999, i.e, 100000 --> kuid <KUID:86311:100000>
-
You could also adopt the kuid2 system: kuid <KUID2:AAAAA:100000:0>, the final figure meaning initial version. Consult the Auran manuals about the kuid system if in doubt.
14: Some minor changes are also needed to be made in the config.txt of the driver icon found in .../scenarios/Zato/ (or by the name you gave to it)
By using your Windows Notepad, open the file and make the following changes:
-
Line kuid <KUID:your kuid here> should read kuid <KUID:AAAAA:BBBBBB> where AAAAA is you Auran ID number and BBBBBB, the number you like from 1 to 999999 but different from the one chosen for the config.txt of the 3D driver object, i.e, 100001. You could also adopt the kuid2 system: kuid <KUID2:AAAAA:100001:0>, the final figure meaning initial version. Consult the Auran manuals about the kuid system if in doubt.
-
Line mesh <KUID:your kuid here> should read kuid <KUID:AAAAA:BBBBBB> where AAAAA is you Auran ID number and BBBBBB, the same number as in chapter 13, relating this driver icon to the 3D mesh and textures used by this DriverCharacter.
|
| |
|
|
| |
|
Installation |
15: And finally, let's install your new driver in TRS2004:
- Folder meshes/Zato (or by the name you gave to it) should be copied and pasted inside TRS2004/World/Custom/meshes. If this folder does not exist, just create it before pasting.
- Folder scenarios/Zato (or by the name you gave to it) should be copied and pasted inside TRS2004/World/Custom/scenarios. If this folder does not exist, just create it before pasting.
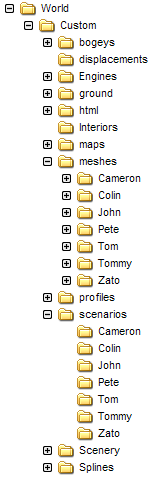
And that's ... Just have a look at the folder structure on your left, that's the way it works...
As seen in this TRS2004, there are extra 7 drivers: Cameron, Colin, John, Pete, Tom, Tommy and Zato
Start TRS2004 and you will find you new driver available who you could use on your sessions. Enjoy it!
|
| |
|
| |
|
You can download (Alberte) Zato Driver from the DS
Click on the image
|
|
|
Download this tutorial in .pdf format  (157 KB) |
|

Special English edition for IBerTrainZ & Auran
|


 by Alberte Zato (IBerTrainZ Staff)